<<Back to Linux Main Page
Step by Step How to Install Openfiler
Where Can I download Openfiler Software?
You can download the openfiler from below link
Step by Step How to Install Openfiler Storage Management Appliance
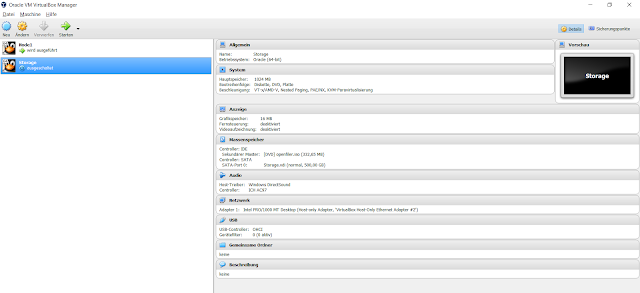
Step1: Prepare Virtual Machine for openfiler Installation
Create your virtual machine with configuration as shown below
1 CPU
1GB RAM
500 GB HDD (this is virtual space and you need not to have this much space physically available)
1 NIC
Visit my post how-to-create-new-virtual-machine to find step by step documentation to create a virtual machine using oracle virtualbox.
Step2: Boot the server with openfiler Image
On this page simply select skip by pressing tab key and click enter
Click Next
Click Next (if you want to choose some other language eg. German , French etc then select appropriate language on this page)
Choose Option "Manually Partition with disk Druid" click Next. Ignore the warning in the popup block by clicking Yes
Click on New and create following partitions
/ 15GB
/boot 5 GB
/tmp 5 GB
/swap 5GB
Note:- Leave the remaining space as Free space
Ensure "Active on Boot" is checked
Click on edit and enter the IP address and Net mask as shown below
Enter hostname "storage.oracle.com" in my case.
Ignore the warning by clicking continue and click Next
Choose appropriate Time Zone and click next
Enter root Password and click next
Click Next.
Once you click Next the Installation will start. It will take few Minutes so just wait to complete the installation
As you can see Installation is completed. Click reboot to reboot the System
Installation of openfiler is completed. In the next I will demonstrate you, how you can configure shared storage using openfiler and present this storage volume to the server.
Step3: Accessing Openfiler using Web URL
You Login to openfiler GUI page on port 446
https://192.9.1.105:446
Default User Name: openfiler
Home page after Login
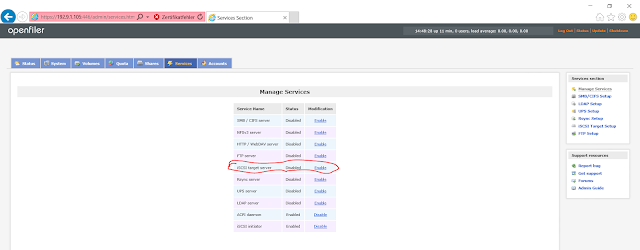
Navigate to Service tab and enable iSCSI target Server
You can also enable iscsi target Server from CLI.
Login to your openfiler Server with user root and given Password at the Installation time.
#service iscsi-target start
#chkconfig --Level 345 iscsi-target on


Comments
Post a Comment